
Growing Sprouts Like a Crunchy 1970s Hippie Has Never Been Easier
Whether you use a mason jar or a kit designed by MIT grads, growing your own microgreens is a cinch

Photo by Merinka / Getty Images
Assorted vegetable sprouts, broccoli, alfalfa, red cabbage in old box on gray stone background with copy space. Top view.
I first started eating like a hippie toward the end of high school. For the first few months of my senior year, I subsisted almost entirely on tofu hot dogs and bean burritos (with the occasional cliché paper sack of granola), but soon graduated to veggie burgers. Once in awhile, I’d splurge on a little cubical plastic tub of alfalfa sprouts to take those crumbly veggie burgers to the zenith of counterculture cuisine. It wasn’t until many years later that I fully leaned into my hippie side and realized I could eschew the overpriced (and let’s face it, wasteful) plastic tubs for the honor of growing my own sprouts.
Even if you’re not you’re all in for the crunchy granola lifestyle, you can’t deny that eating sprouts is good for you. And even if you don’t have a garden (or even a window!), you can still grow your own sprouts and microgreens. Here’s why you should: a) it’s actually pretty easy and b) you’ll never have fresher, more nutritious food than sprouts you just snipped seconds ago. Oh, and c) they also taste good. Whether or not you want to heap more nutritional value into your daily diet or just want to add more pretty microgreens to your dishes for the Instagram love, here are a few of the ways you can grow your own sprouts—plus some pros and cons of each.
Old-School Methods

Photo by Nedim_B / Getty Images
On a Napkin
More Videos From Sunset
When I was little, my dad used to germinate cannabis seeds on a wet paper towel sitting on a saucer. He wasn’t exactly doing it for the microgreens, if you catch my drift, but that technique can just as easily be applied to growing broccoli or radish sprouts. It’s pretty much the same as the simple technique outlined in ultimate guide to the hippie lifestyle, Alicia Bay Laurel’s seminalLiving on the Earth (published in Berkeley in 1970): “moisten a clean cloth and cover half of one side with seeds. Fold over again and put the cloth in a plastic bag with a little extra water. Put the bag in a dark place.” If you’re growing alfalfa, Laurel figures you’ll have sprouts in as few as four days (it’ll take a little longer for mung beans), but the best thing about this method, she points out, is that it allows you to grow sprouts right inside your rucksack while you’re backpacking, giving you access to fresh vegetables without the weight.
Pros: Pretty much the cheapest method, no special equipment needed.
Cons: Ugh, plastic bags. (If you don’t like plastic bags, you could do this in a resealable container.)
Jar Method
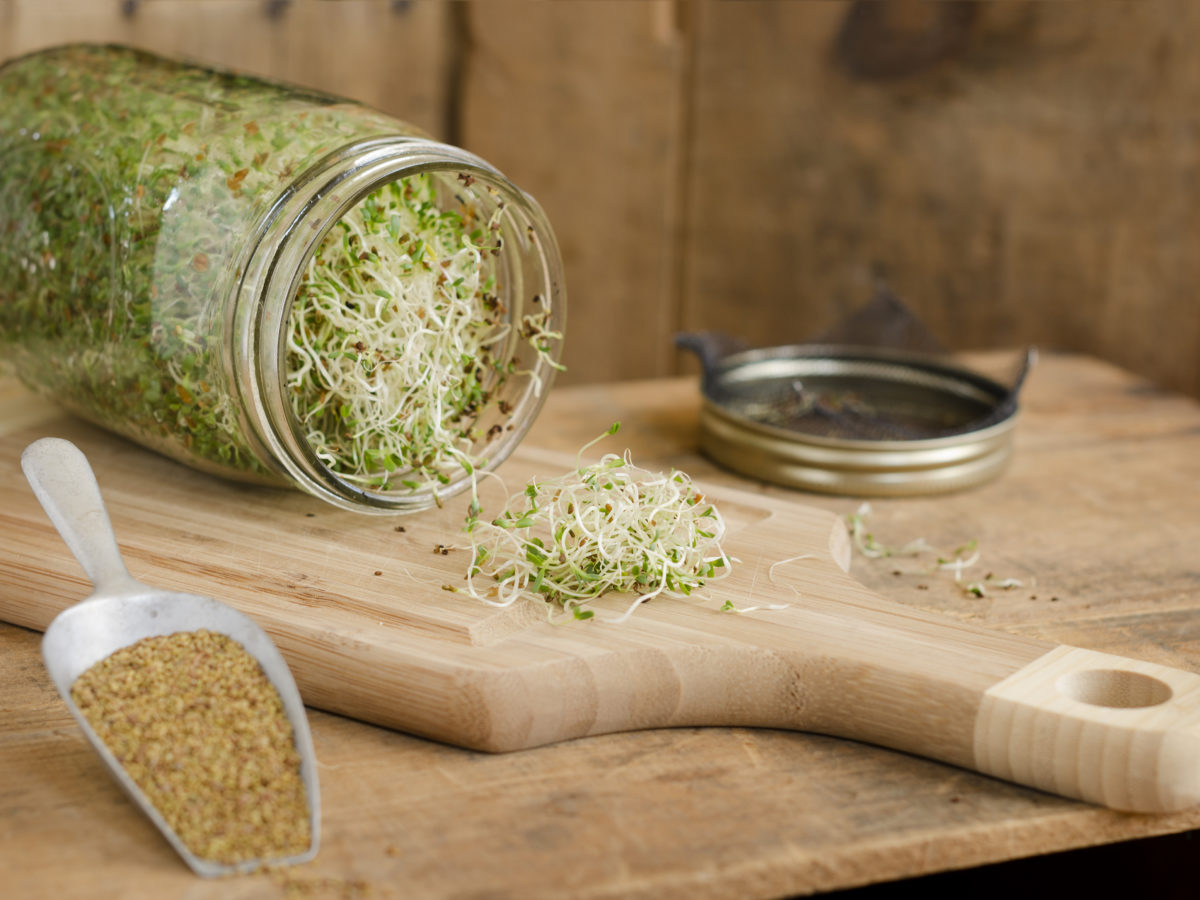
Photo by Brycia James / Getty Images
Laurel’s book also outlines the jar method, which is another straightforward method that was probably used by those organic cosmic-consciousness hippies at the Whole Earth Restaurant back in ’71. The jar method, still widely used today, grows sprouts in a standard wide mouth mason quart jar, either with a specialized mesh lid or a scrap of gauze or cheesecloth secured with a rubber band or by screwing the jar band over the fabric. You soak, rinse, and sprout the seeds right in the jar, allowing them to drain by propping the jars at an angle (either in a rack or leaned against a rolled-up towel).
Pros: Affordable, you probably already have a few spare jars, plus you can reuse jars infinitely.
Cons: Requires a bit of babysitting once or twice daily, and wastes water (all that rinsing!).
Upcycled Plastic Trays
If you’re like me, you assuage your guilt for getting take-out by stockpiling the containers in your garage “just in case,” and every time you see them out there you mean to, I dunno, use them for a DIY upcycled art project or something? Well, friends, I found the ultimate way to reuse those trays: grow sprouts in them! Poke or drill some drain holes into the tray, add some soil, then sow your seeds. Give them light and enough water to keep the soil moist, and you’ll have edible sprouts within a week.
(Bonus tip: Those big tubs in which salad and spinach are sold can be used as mini seed-starting greenhouses. Just add a few inches of moist soil, sow your seeds, then attach the lid. This will give you a warmer microclimate to give you a few weeks’ jump on spring.)
Pros: Pretty much free, and keeps plastic out of the waste stream for just a little while longer. You can also use pretty much any plastic or styrofoam trays.
Cons: You have to make a few modifications to the trays before they can be used (not really a big deal).
Sprouting Kits
I tried out a few different kits that are made specifically for growing sprouts, with mixed results—here are a few that might work for you.
HAMAMA Grow Kit and Seed Quilts

Photo courtesy of HAMAMA
I hate playing favorites, but this one was, for me, the clear winner for growing sprouts at home. HAMAMA was started by two MIT graduates who did years of research and work in high-tech indoor agriculture, which makes a lot of sense when you see how efficient (and sleek!) their kit is. That said, there isn’t really anything particularly technological about these kits; they consist of a black plastic tray that nests in an (optional) open bamboo frame. The real breakthrough is in the seed delivery system: a seed quilt sits on a bed of coconut fiber, which acts as the substrate for the sprouts’ roots as well as a wick to keep the seeds and sprouts moist. After the sprouts have been harvested, you simply compost the coconut fiber mat with the roots.
Pros: It couldn’t be easier to grow sprouts in this kit, and with the bamboo frame, it looks nice enough to leave on the counter. Clean-up is also a snap since the whole growing pad can be tossed right into the compost. This kit saves water since you only have to fill it once, and the sprouts don’t have to be rinsed every day—this design also means that you can set it up and then ignore it for nearly a week without having to worry about your sprouts dying.
Cons: You have to keep buying new seed quilts (3/$17), which means your microgreens end up being nearly as expensive as buying them at Whole Foods.
Handy Pantry Sprout Garden
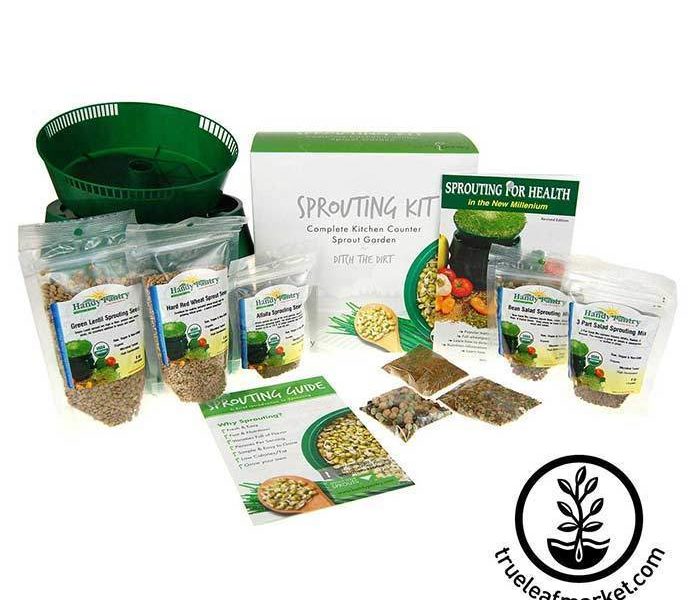
Photo courtesy of True Leaf Market
From Utah-based True Leaf Market, the Handy Pantry Sprout Garden consists of two circular, nesting green trays, one of which has drainage holes. Two of these tray sets come in a basic kit, along with a generous amount of seeds–I think it would take months or a year to work through all of them. Also included is a *very* thorough instruction manual, which reads something like a cross between a Sylvester Graham treatise on sexual urges and the label on a Dr. Bronner’s castile soap bottle. (I wish I were kidding!) It’s at once a bizarre manifesto on how toxicity accumulation causes STDs, and an idealistic promise about the salubrious powers of microgreens. I’d definitely take their scientific claims with a very large grain of salt, but I can’t say it’s not entertaining.
Pros: Can be used with any seed, but is especially effective for growing larger sprouts like sunflower and wheatgrass. The mixed salad seeds that came with the kit sprouted overnight!
Cons: Similar to the jar method, this kit instructs you to soak the seed overnight and then to rinse two or three times a day. Even though they’re BPA-free, the plastic trays looked kind of flimsy.
Chia Pets
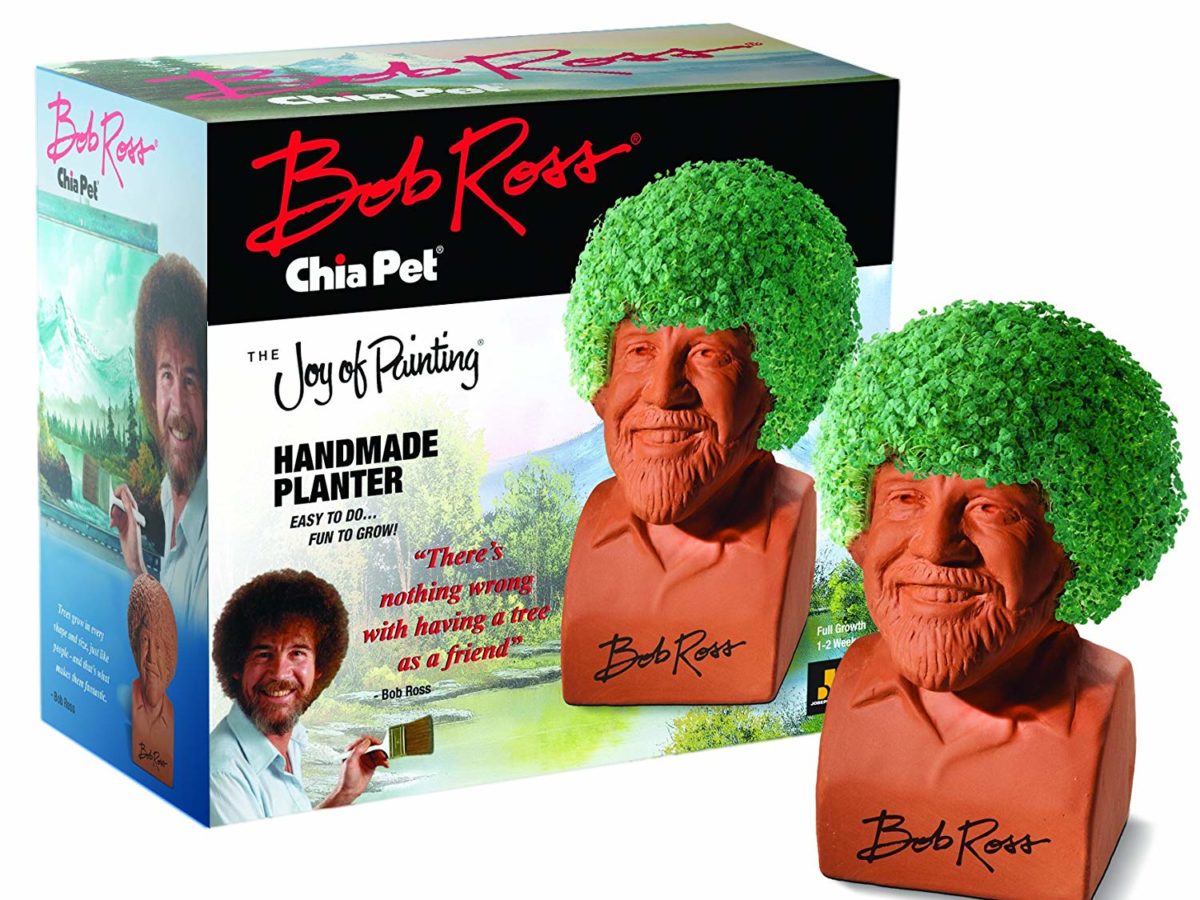
Photo courtesy of Chia
First of all, yes, you can totally eat chia sprouts right off your Chia Pets and Chia Heads. But more importantly, you can grow any small sprout (like alfalfa or basil) on a ceramic Bob Ross or Golden Girl and all I can say is folks, this is living.
Pros: Happy little sprouts.
Cons: Welp.
Whether or not you opt to grow your own, sprouts are an undeniable part of the counterculture diet, and will always be a symbol of Western—if not hippie—living.
[P.S. While I haven’t tried them myself, Sunset‘s social media director Kendra Poppy swears by the Orta Garden seed pots; the tiny terra cotta pots sit in a little tray that keeps them evenly moist with weekly watering. I didn’t include them in my tests because they’re for growing plant starts, rather than specifically for growing sprouts.]
