A Professional Breaks Down the Secrets to Perfect Pour-Over Coffee
The perfect pour-over is not nearly as hard as you think—and it’s absolutely worth the effort.
Photo by Joshua Rodriguez on Unsplash
Written byBatSheva Vaknin, of Aharon Coffee
February 23, 2021
Share this story
We only recommend things we love. If you buy something through our site, we might earn a commission.
The pour-over coffee brewing method has been around for decades and it is still considered by coffee professionals to be the premier method for brewing a divine cup of coffee.
Aharon Coffee founder Aharon Vaknin enjoys at least one pour-over a day—not just for the wonderful tasting resulting cup of coffee, but also because he deeply enjoys the ritual.
If you enjoy drip coffee, consider trying the pour-over method, especially if you are someone who likes to do things yourself. This method is simple, empowering, and a wonderful way to earn the enjoyment of a joyful cup of coffee.
Get ready to take your coffee enjoyment to the next level!
1. Start with the Best Coffee
Find the coffee that you will love! Look at the flavor profiles, and/or contact Aharon Coffee if you want help choosing the beans that you will love the most. Naturally, we recommend brewing Aharon Coffee.
2. Use a Pour-Over Set
We use the Hario V60 server in our store along with the dripper and we also have the plastic version of the V60 at home (great for travel and won’t break on you). Use the 02 size, and get matching paper filters.
The Chemex is elegant and brews an incredible cup. Choose the size that best suits you. Make sure to get the Chemex filters as they are designed specifically for the Chemex.
3. Grind the Coffee
Have a look at this blog to see why the grinder used to grind your coffee is so important. If you want your beans to last longer, invest in a grinder.
For Hario V60 pour-overs (or similar), use “drip” grind.
If you use a Chemex, try grinding a bit differently: We have found the perfect grind for Chemex is actually a bit coarser than drip—one or two clicks more coarse, but still not as course as for French press.
We love this Encore by Baratza. If you will consume the beans within a week or so, you can ask us to grind your coffee for you.
4. Put the Paper Filter Inside the Cone and Pre-Heat/Wet
Fold filter along the crease so it fits snugly inside the cone. Pour 200-degree water evenly over and into the filter and through to the cup or server below—this is to pre-heat the cup/server and to take any paper taste from the filter. Then dump the water.
5. Measure or Weigh Coffee Grinds and Put Them into the Filter
We use a very simple ratio: 1g of coffee to every 15g of water poured over.
So for a single 12-oz cup of coffee, we use 26g of coffee and a total of 390g of water—yes, we do our pour-overs on top of a scale. For a 2-cup Chemex brew, we use 45g of coffee and a total of 675g of water.
If you don’t have and don’t want a scale, 4 level tablespoons for each 12-oz cup of coffee works perfectly.
6. Heat Filtered (Not Tap) Water to 200 Degrees
Check out this blog to understand the part water plays in making your coffee taste fantastic. (Hint: It plays a BIG part.) Please do not use tap water; your coffee will not taste amazing.
We love the Bonavita gooseneck kettle because it has a setting that keeps the water hot until you are ready to pour. It helps to have a gooseneck in order to control the pour.
7. Control the Pour: Start with the Bloom
Pour slowly and evenly, until the grinds are covered in a thin layer of water—double the weight of the grinds you started with. That means 50g of water for the single-cup bloom phase, or 90g of water for the double-cup Chemex, poured over the grinds. Allow the coffee to de-gas, releasing harmless gases that got trapped during the roasting process. This phase is called the bloom and it’s beautiful to witness!
After 30-45 seconds for your bloom, keep pouring. Evenly, slowly. The goal is to evenly extract the coffee from the grinds, so keep that in mind as you pour.
Some prefer pouring the water in concentric circles, others like to keep the water focused towards the edge of the coffee where it meets the filter, only crossing over the middle of the coffee occasionally. Aim for few or zero craters in the grinds, but instead a smooth wet surface.
Never pour too much water at once to where it is filled to the top of the cone, and never allow the water to drain completely before continuing your pour.
Complete your pour once you reach the target weight and volume for your coffee cup. A 12-oz (mug-sized) pour-over generally takes between 2 ½ – 4 minutes.
8. Enjoy Your Coffee
Like this really needed to be a step!
Pro tip: If you accidentally poured too much water and it’s still in the cone, just remove the cone/filter combo (with grinds and water inside) before it drips all the way through the coffee. Remember, it’s not rocket science! This is your moment.
Important: Boiling water is not a friend of coffee! Depending on your preference, you want water that’s between 195 and 202 degrees, and to control that temperature, you need one of these highly precise Bonavita kettles, which warm the water quickly and pour quite elegantly.
Bonavita 1.0L Variable Temperature Gooseneck Kettle, $95
2 of 11Courtesy of Amazon
Scales: Not Just for Geeks
Okay, we know what you’re going to say: Seriously, a scale? I am not a coffee geek! Fair enough. But if you want to make better coffee, you need to know precisely how much coffee you’re using, and the Hario is going to tell you that, measuring beans to 0.1 grams. Trust us, within days of starting to do this, it’ll seem entirely natural, and the idea of using a scoop will sound ridiculous. Bonus: You can use it to measure things other than coffee, like artisan flour.
Hario V60 Drip Coffee Scale and Timer, $64.25
3 of 11Courtesy of Food52
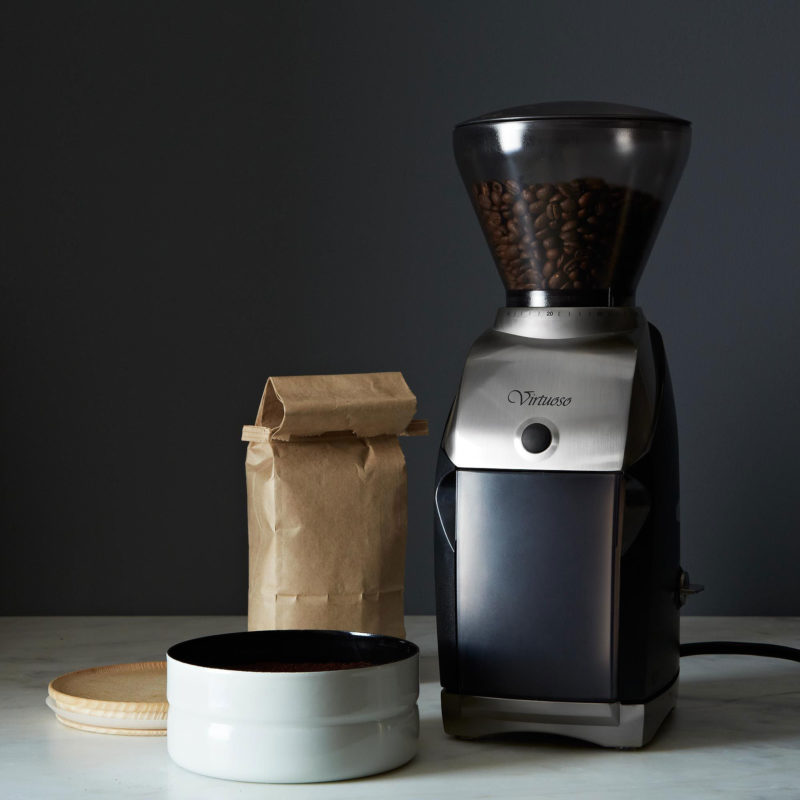
Grind It Right, Right?
Nothing beats freshly ground coffee, and with this grinder from Bellevue, WA–based Baratza, you can choose from 40 grind settings to truly become an expert on how coarse or how fine you want your grounds.
Baratza Virtuoso+, $249
4 of 11Courtesy of Amazon
Easy Espresso: AeroPress
When it comes to roughing it, most of us draw the line at giving up morning coffee. Luckily, there’s the AeroPress, invented by the same entrepreneur behind the Aerobie, the magical flying disk. This innovative coffee maker has garnered thousands of rave reviews for its ability to brew perfect americano or espresso in 30 seconds. Easier and more reliable than a French press, it uses air pressure to press boiling water through coffee grounds and straight into your cup. Cleanup takes about a minute, and the durable pieces store neatly in a travel bag, making the AeroPress the perfect camping gadget to bring along for a cuppa.
AeroPress Coffee and Espresso Maker, $30
5 of 11Courtesy of Amazon
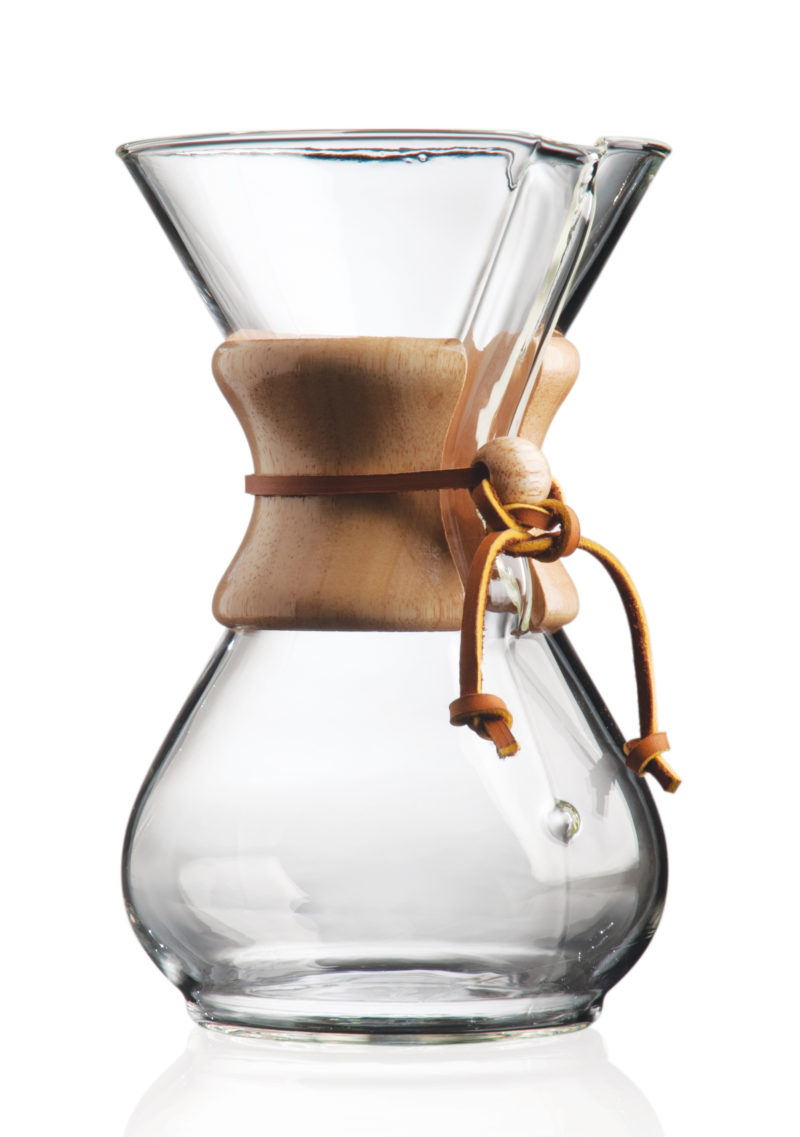
Slow and Simple: Chemex
Time-tested and beloved by baristas and home brewers alike, the pour-over offers a pure expression of a bean’s flavor profile. Designed in 1941 by an eccentric chemist, timeless.
CHEMEX Pour-Over Glass Coffeemaker, 6-Cup, $45
6 of 11Courtesy of Breville
The Convert: Breville Barista Pro
A perfect all-in-one solution for the at-home barista, this unit takes up minimal counter space, and looks good doing it. We’re huge fans of the integrated burr grinder—which saves additional space—as well as the smart grind adaptor feature. The best part: It’s ready to brew mere seconds after firing up.
Breville Barista Pro, $800
7 of 11Courtesy of Blue Bottle
Cold Brew, Overnight: Hario Coldbrew System
Stop paying $6 for iced coffee. It’s not rocket science: Throw some ground coffee in the filter of this unit and you’ll have wonderful coffee all week long, for a tenth of the price of store-bought brew.
Hario Cold Brew Bottle, $35
8 of 11Courtesy of La Marzocco
The Virtuoso: La Marzocco Linea Mini
Used in many commercial contexts, the Ferrari of espresso machines boasts a dual boiler system for keeping the brew head and steam wand ready for action simultaneously. You’ll coax wonderful shots out of this unit, but like a Leica rangefinder camera or a vintage manual race car, it requires finesse to see top results. Isn’t that part of the goal?
La Marzocco Linea Mini, $5,400
9 of 11Courtesy of Amazon
Pretend You’re in a Fancy Café
Your pour-over coffee game is about to get even better. For the fancy coffee aficionado, this sleek model features a beautiful glass dripper which rests on a brass stand with an American walnut base. The stand adjusts to the height of your mug or pot.
Brass Pour Over Coffee Dripper, $60
10 of 11Courtesy of Ember
A Smarter Sip
Smart technology comes to the teahouse with this mug that keeps your coffee consistently toasty warm at your desired temperature. Sitting with your drink for a spell? Keep your mug resting in the battery-powered base to ensure the warmth stays in check. Want to take it to go? The Ember comes in a travel mug version, powered by a portable battery (although it won’t stay warm for as long as the desktop version). Originally available in white, we love the matte black finish for its neo-noir vibe.
Ember Temperature Control Smart Mug, $109.95
11 of 11Nicole Clausing
French Press
Nothing beats the rich, silky cup of coffee you get from a French press. We particularly like this one, with its unbreakable stainless steel construction.