Create a spring-inspired accent to brighten your window with this easy project
Thomas J. Story
Add a springtime accent to your window
Written byJess ChamberlainSeptember 19, 2012
Share this story
Give a blank roller shade an airy, elegant new look with the image of your choice, applied in a few easy steps.
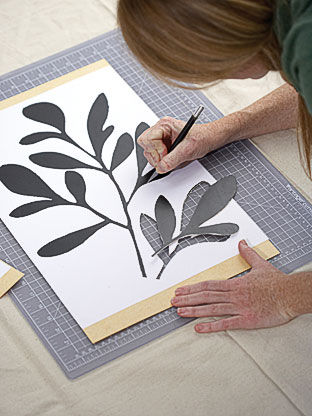
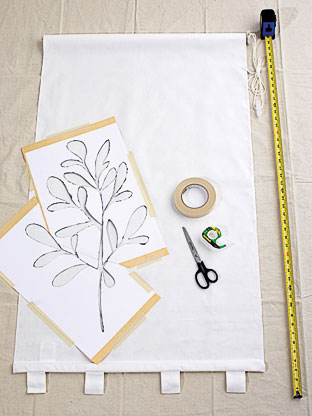
Using a paper product called stencil board or heavy card stock, you can create a stencil from almost any simple design (or download our sprig of leaves at www.sunset.com/leafstencil). Clip art is a great resource for images. Silhouettes with no intricate details work best; choose an image with design elements that don’t overlap, so the pattern can be cut out as one piece.
We combined fabric paint in dark green and golden yellow with a bit of white and black to create a leafy green. Our project cost $29, not including the shades.
Materials
For this project, we used two 27- by 72-inch canvas roller shades. The rest of the materials are available at art-supply stores unless otherwise noted. Make sure you choose a fabric paint that works with your shade’s material.
Scissors
Clip-art book (or create your own image)
Photocopier
Transparent tape
Lightweight work gloves
Spray mount
Stencil board or heavy card stock
Cutting board (at least half the size of your image)
Craft knife (plus extra blades)
One or more fabric roller shades
Drop cloth
Tape measure
Pencil
Painter’s tape
Flat-head paintbrush
Fabric paint
Instructions
1. Cut out image from clip-art book or other source. Using photocopier, enlarge image to desired size if necessary. (Note: If you need a larger image than your photocopier can create, cut the image in half, then enlarge each half to the desired size. Tape the halves together to form a single image in step 3.)
Thomas J. Story
Step 2: Cut out the image
2. Wearing gloves and working in a well-ventilated area, use spray mount to glue image to stencil board or card stock. When dry, lay stencil board on cutting board. With the craft knife, carefully cut out the image. You may need to go over your cuts more than once to be able to lift out image. Replace blades as needed.
Thomas J. Story
Step 3: Placing the image on the shade
3. Lay one roller shade flat on drop cloth with the side that will face the room facing up. Use tape measure and pencil to mark desired stencil placement. Secure stencil to the shade with painter’s tape.
Thomas J. Story
Step 4: Painting
4. With the paintbrush, dab fabric paint through stencil cutouts onto the shade. To keep stencil from moving, press your fingers near the section you’re painting. Once paint is dry, remove stencil and follow fabric-paint instructions, if necessary, for setting paint.
5. To reverse image, as shown on the two shades here, be sure paint on stencil board is completely dry, then flip stencil board over, position on a second shade, and begin with step 3.