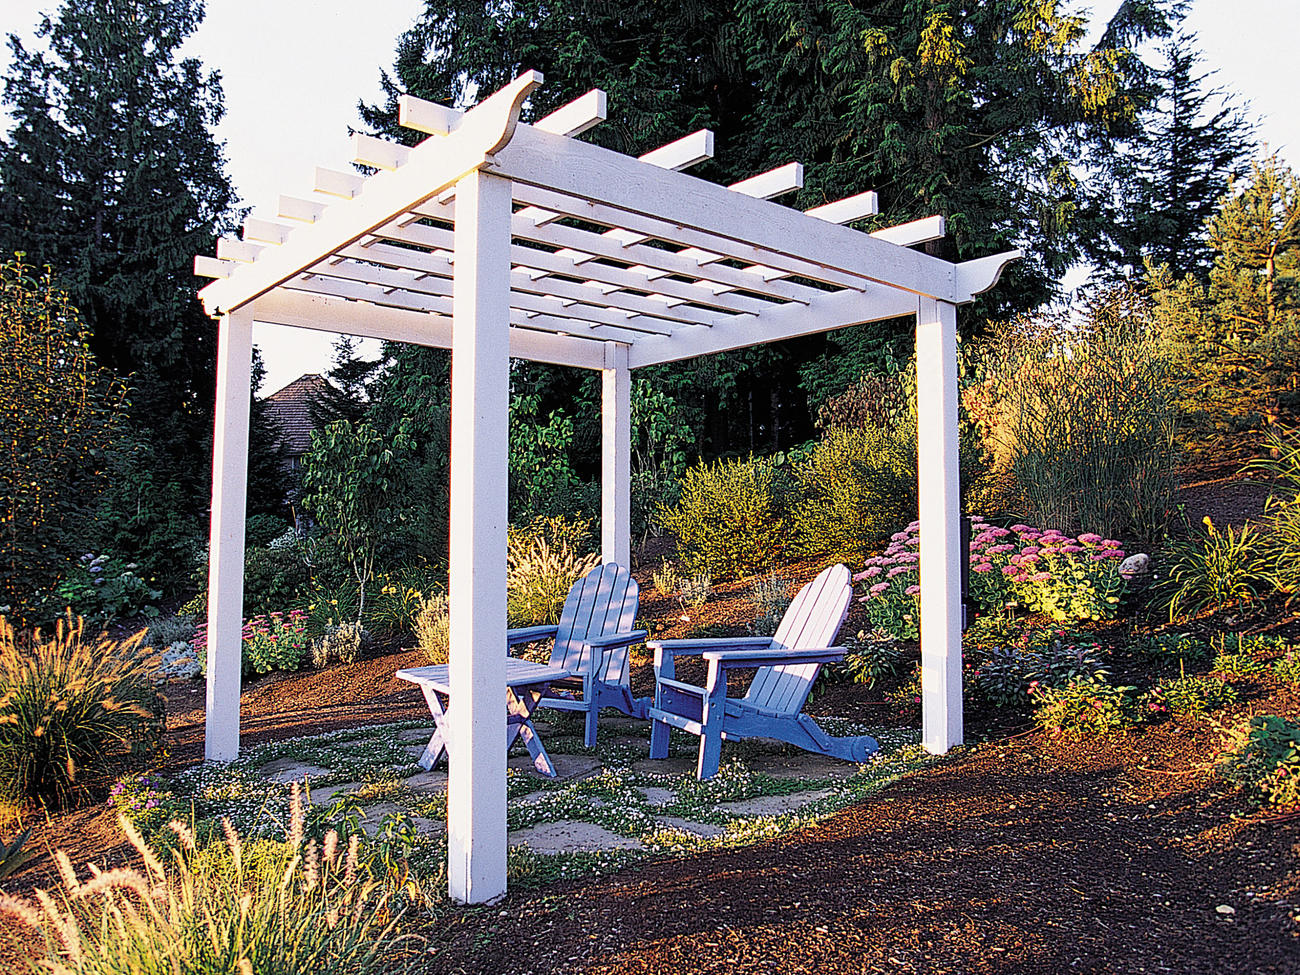
Handsome wood trellis turns a patch of backyard into a shady kick-back space
Philip Harvey; design by Lankford Associates
This simple square trellis turns a patch of ground into a handsome outdoor room
Written bySunset
January 7, 2010
Share this story
This 8-foot-square trellis provides an inviting place to relax and enhances the view of the garden from the house. These homeowners were handy enough to build it themselves, but you could have a contractor do it for you.
This 8-foot-square trellis provides an inviting place to relax and enhances the view of the garden from the house. These homeowners were handy enough to build it themselves, but you could have a contractor do it for you, too.
Directions
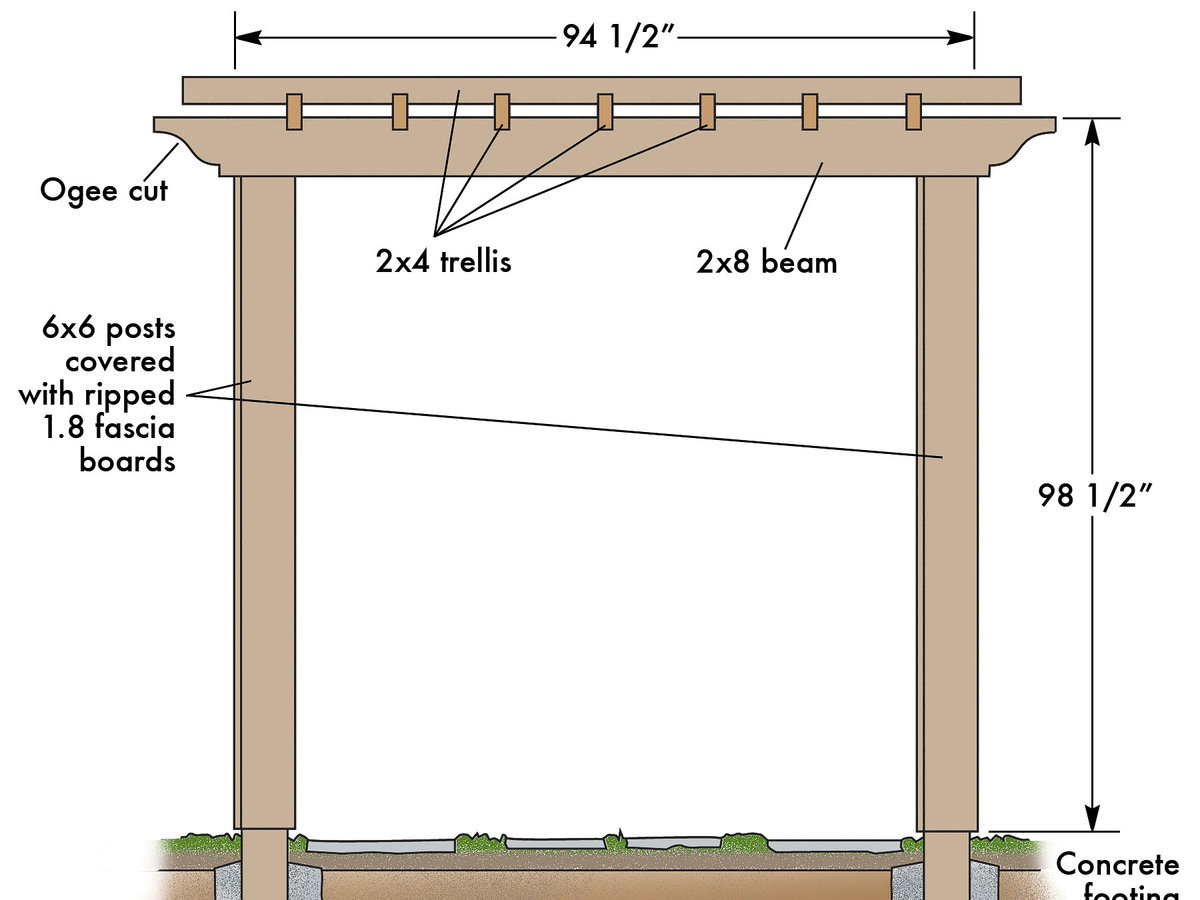
1. Lay out the post locations by using batterboards and string so that the outside dimension of each “side” is 94½ inches. Measure for equal diagonal dimensions to verify that the structure will be square. Mark the batterboards.
2. Dig holes for the footings. Set each post on about 3 inches of gravel at the bottom of each hole. Hold the posts plumb by placing diagonal braces at right angles to each other. Pour the footings.
3. Using a level and an 8-foot-long straight board, or a water level, mark the tops of the posts at 8 feet, 2½ inches. Clamp or tack a saw guide to the posts to ensure a safe and accurate cut with a circular saw. Be very careful when cutting while standing on top of a ladder.
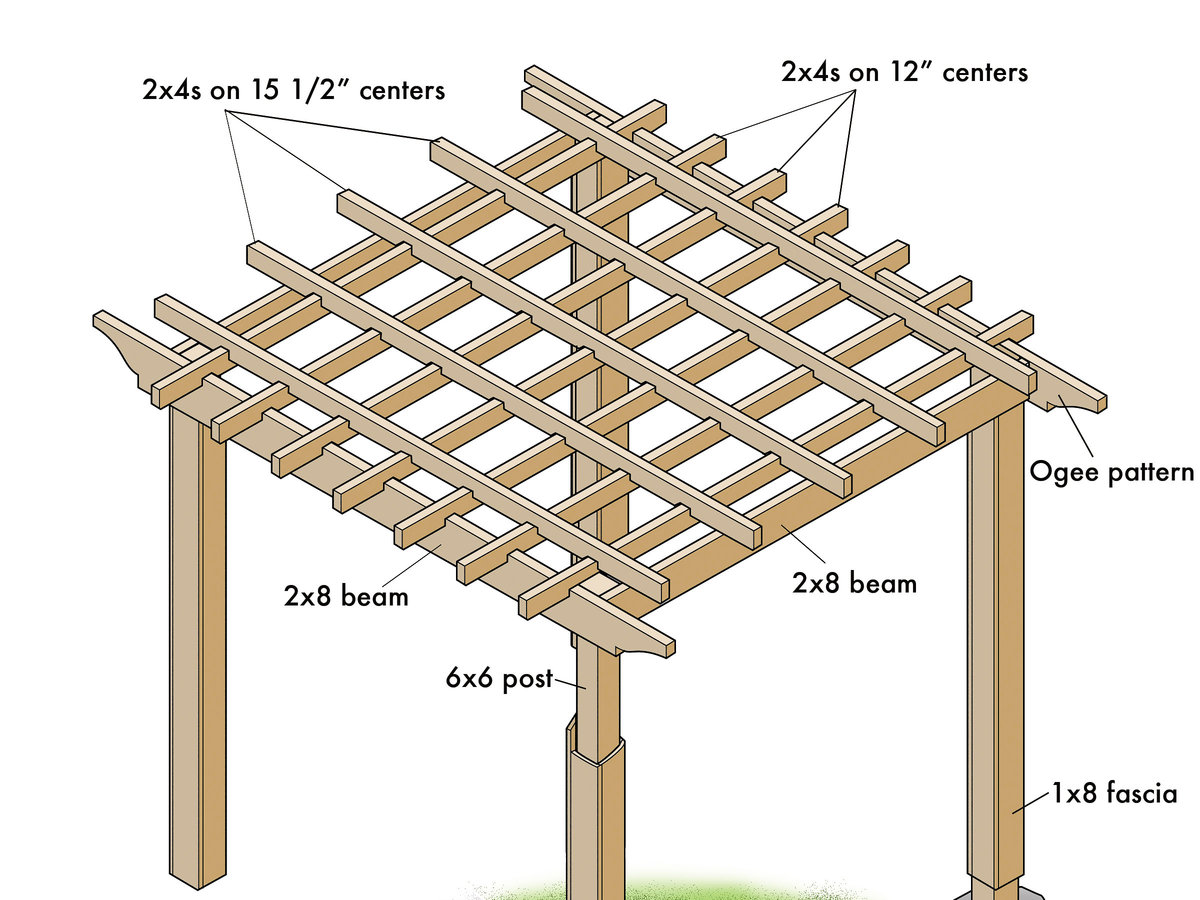
4. Cut the two long beams to length, and cut the ogee detail. Make a template for the ogee detail by using a jigsaw and 1⁄4-inch plywood or similar scrap. Then clamp the template onto the beams to guide your cuts. Lay out the tops of the beams for the 12-inch-on-center 2 by 4s. Secure them with exterior nails or screws.
5. Cut the two side beams to length―equal to the outside post-to-post distance―and then secure the beams flush to the post tops with exterior nails or screws.
6. For each post, rip two fascia boards that are about 3⁄16 inch wider than the post width and two that are 1½ inches wider than these.
7. Cut a 3⁄4-by-7¼-inch notch at the top of one inside-corner fascia board for each post so it will fit around the beam. Nail the two outside-corner boards together, and then secure them to the posts; do the same for the inside-corner boards.
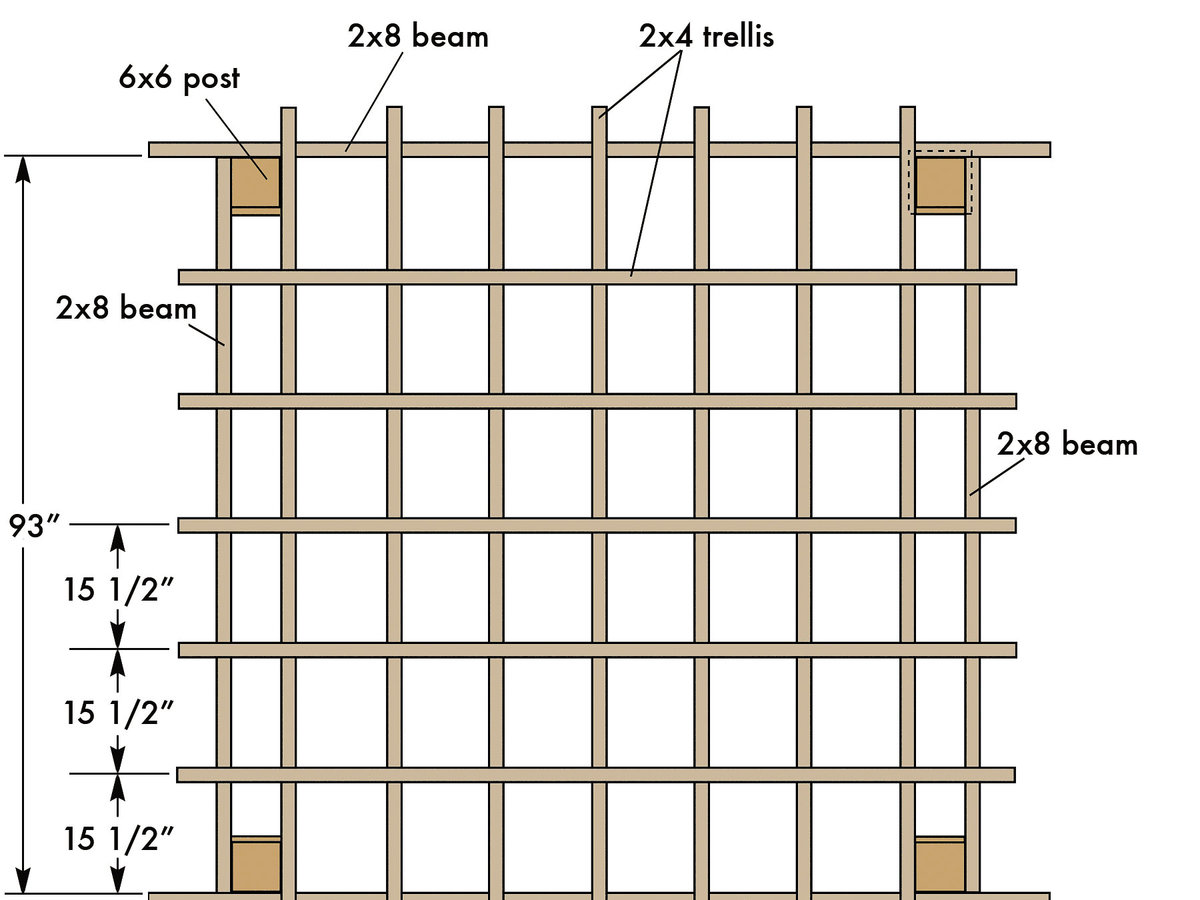
8. Cut the lower 2-by-4 trellis members to length. Lay one across the top of the long beams on one end, center it for an equal overhang on each side, and then mark the 1-by-1½-inch notches where the member crosses the two beams. Use this piece as a template for cutting the notches in the other 2 by 4s that run this direction.
9. Cut the top 2-by-4 trellis members to length. Locate and cut the notches in the bottoms of them as you did for those in the first course. Predrill pilot holes, and then toenail the members onto the tops of the first course of trellis.
10. Sand the fascia, and ease the corners to eliminate any splinters. Touch up the primer as needed, and apply a topcoat of 100 percent acrylic latex paint to the entire structure.
Design details
Pressure-treated posts, though ideal for durability (especially below grade), inevitably crack, or “check.” While checking does not affect strength, it can be unsightly when the wood is painted.
Capping the posts with boards more suitable for painting, such as better grades of pine or redwood, gives this structure the benefits of both types of wood.
In addition, the fascia provides a ledge for the 2-by-8 beams, effectively eliminating the need for bolted connections.
The architectural details at the ends of the front and rear beams can be adapted to blend with design elements of your home or garden. Before cutting the beams, experiment with shaped plywood patterns tacked onto the ends of uncut 2-bys.
Building notes
Cut the posts in place after erecting them. Lay out the positions of the crossing 2-by-4 trellis pieces, and then mark the tops of the lower ones for the overlapping pieces.
Cut the fascia boards so they will end a couple of inches above a concrete patio and even more above soil or plants. After cutting the posts’ 1-by-8 fascia boards, soak the ends in a wood preservative to protect the end grain from moisture damage.
To install the two side beams, tack cleats onto posts 7¼ inches down from the top.
Cut the notches in the trellis 2 by 4s with a jigsaw, using the first board as a template for the others; or, clamp the 2 by 4s side by side for gang cutting with a circular saw.
Prime all the cut lumber before installing it. Use a drum sander or sanding attachment to smooth the end grain of the ogee cuts on the long beams. Countersink all nails, and then fill the holes with exterior filler prior to applying the finish coat.

