A Table That Makes Waves

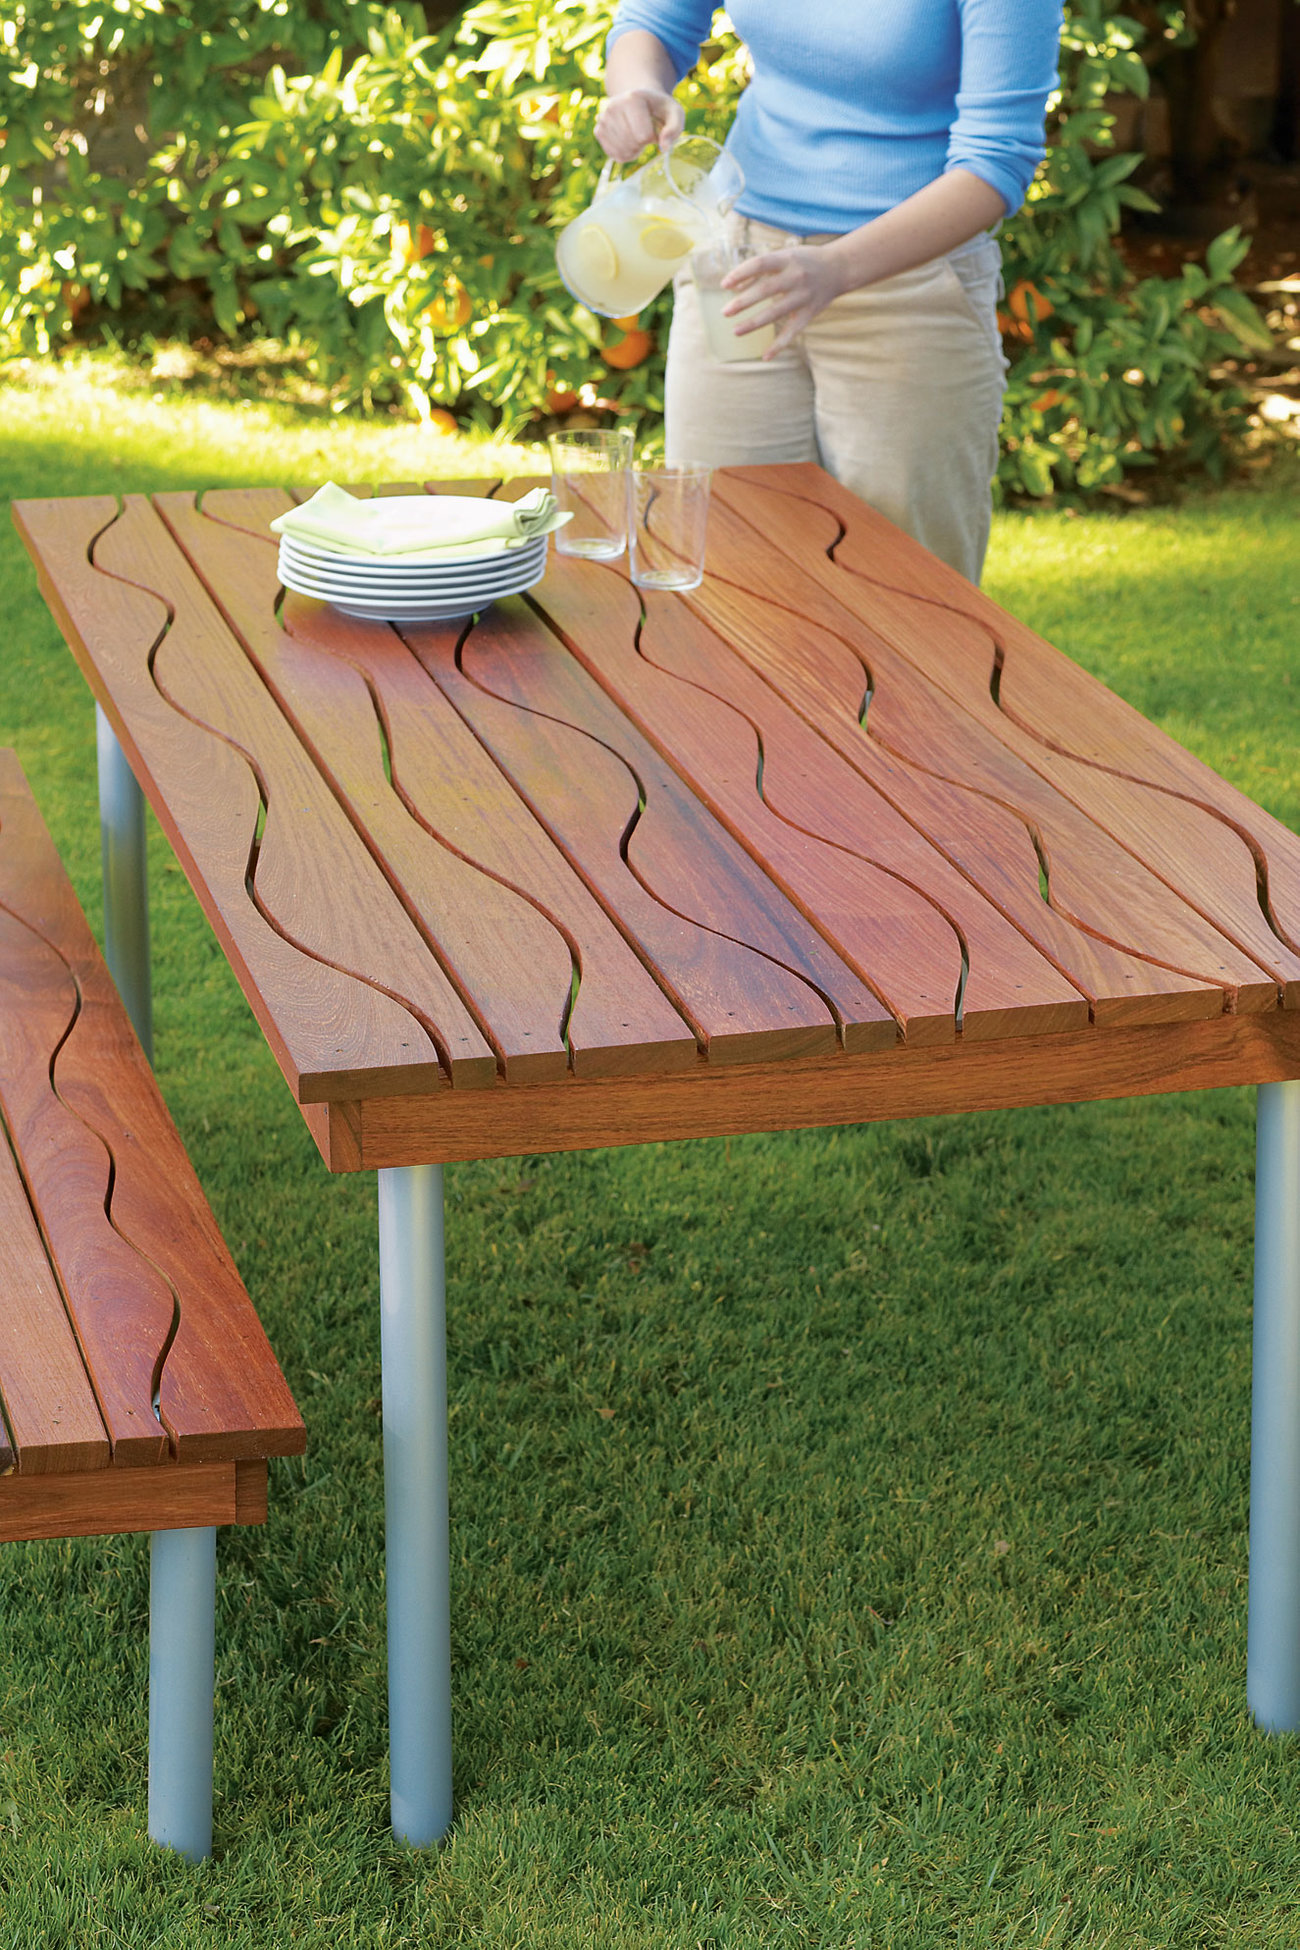
The spaces between the boards of this picnic table look like lazy ripples in a slow-moving stream. The unusual patterning couldn’t be simpler to create: With a saber saw, we cut each of the boards freehand. To save time and to make the project easy, we made only the top and then added a set of ready-made table legs from Ikea.
We created the 3- by 6-foot tabletop with a wood called machiche, purchased at a ”green building” lumberyard. Other sustainably harvested or recycled woods ― including ipe, Western red cedar, and redwood ― could be used.
Materials
- Eight 6-foot-long 1-by-6s or 2-by-6s
- 150-grit sandpaper
- ½ pound of 2-inch-long trim-head wood screws (or substitute deck screws)
- Penetrating sealer (we used Minwax)
- Table legs with brackets (we used Ikea’s tubular Vika Curry legs with a silvery finish)
Tools
- Pencil
- Tape measure
- Saber saw
- Electric sander or sanding block
- Table or circular saw
- Framing square
- Paintbrush
- Electric drill
Directions
- Draw curving lines down the center of each of six boards, allowing at least 1 inch of margin at the boards’ edges. The shape of the curves should not be identical.
- Following the lines, cut the boards in half with the saber saw. Label each pair so you’ll be able to easily match them later.
- Sand the boards. Pair by pair, lay them out about 3/8 inch apart on a flat surface. Measure the combined width; it should be about 36 inches, but could vary according to original width of boards.
- Using the table saw, rip the remaining two boards in half lengthwise.
- For the frame beneath the tabletop, cut 2 inches off the ends of two of the ripped boards. From the remaining ripped boards, cut four pieces, each 32½ inches long (if your tabletop isn’t 36 inches wide, cut the four pieces 3½ inches shorter than the top’s width).
- To make the frame, screw the long pieces into the ends of two short pieces, creating a rectangle that measures 70 inches by 34 inches (for a 36-in.-wide top). Position two remaining short pieces evenly from the ends and from one another and attach with screws.
- Sand all the frame and top boards and apply one coat of sealer. Let dry.
- Lay top pieces on frame; top should overhang frame by 1 inch on all sides. On the top side of the table, lightly draw lines centered above all crosspieces. Drill holes for screws: one for each overlap of board and crosspiece below. Screw on top boards.
- Erase or sand lines, then finish the tabletop with two more coats of sealer.
- Add brackets and legs to underside at each corner. Depending on thickness of wood, you may need to use shorter screws to attach brackets so the screws don’t poke through tabletop.
Options
The same technique can be used for a gate, a doormat, a trivet, or a decorative shutter.
You can also make a pair of matching benches that are two-and-a-half boards wide with a similar frame. For bench legs, buy three sets of table legs and have a sheet-metal fabricator cut them to 17 inches long. For extra stability, use a hacksaw to trim a small semicircle off one side of each leg bracket (so the legs can be attached closer to the edges of the bench). Attach legs at each end and at midpoint of bench.
