
How to use an olla to water your garden

We’ve been talking about ollas for the last few months in our efforts to find more efficient methods or watering. If you’re just joining us now, an olla is essentially an unglazed clay pot that you bury in the ground, fill with water, and allow plant roots to pull as much water as they need through the clay.

We put an olla to test in the Sunset Test Garden and have been pretty impressed with the results so far. All we need to do is fill the olla with water once a week and the plants take care of themselves.
Here’s how we set it up.

Step 1: Dig
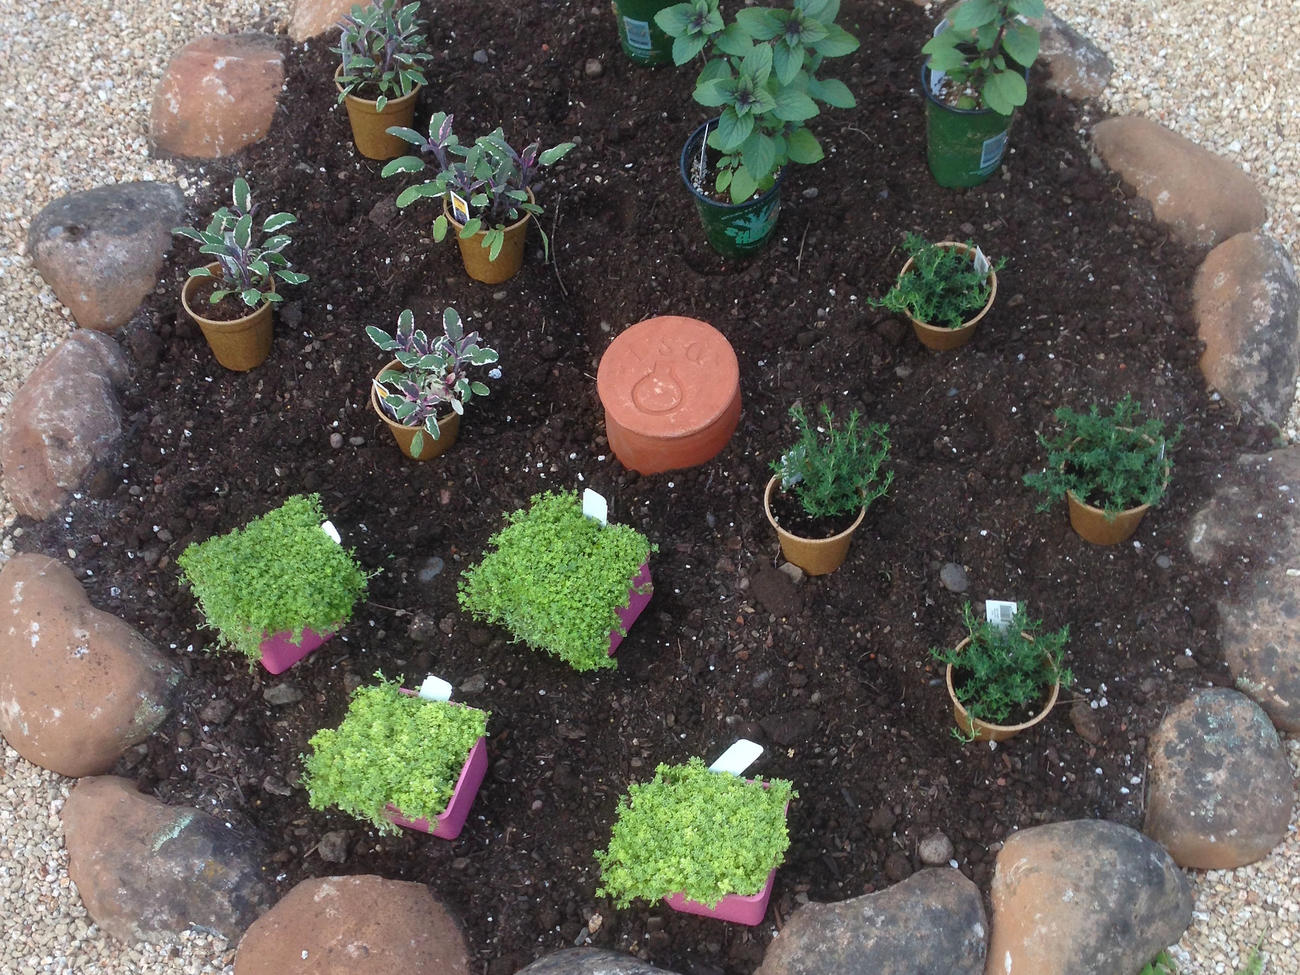
Dig a hole in a well amended garden bed large enough to submerge the olla.

Step 2: Bury
Bury the olla in the ground, leaving the neck exposed above soil level.

Step 3: Plant
Lay out plants within a 36″ diameter to the olla. We chose Mediterranean herbs, including German thyme, variegated thyme, tricolor sage, and ‘Magic Mountain’ basil.

Step 4: Water
Fill the olla to the brim with water and cover with the clay cap to prevent evaporation. Plant roots will draw water through the clay.
UPDATE (2 months later): For the first few weeks after planting out the herb seedlings, I also hand-watered the plants with a watering can, assuming that baby plant roots might not have enough pull to draw water from up to 36 inches away. Once the plants got established, I’ve relied entirely on the olla to water and the herbs are thriving.
In fact, the ‘Magic Mountain’ basil grew so quickly that it began taking over the rest of the bed and I ended up replacing it with low-growing ‘Chef’s Choice’ rosemary. Stay tuned for an aftershot of the herb bed in an upcoming garden-to-table story!