Making beeswax candles

Note to the wise: If planning to make more than a few candles, DO NOT try it with only one candle mold. It’ll take DAYS.
Supplies:
-Candle mold(s) of choice. We chose the Bear and Hive mold purchased from Mann Lake Ltd.
-Heavy rubber band (ours came with the purchased mold)
-Kitchen scale
-Wax paper or foil to protect working surface
-Wick (Size depends on candle mold. Ours uses 2/0 ply)
-Wicking tool or large needle to thread wick through mold
-Beeswax (We used our filtered wax)
-Double boiler (we used a saucepan and a large bowl)
-Glass measuring cup, or pouring pot
-Bobby pin
-Scissors
-Wick holder tabs
-PAM cooking spray or candle release spray (optional)
Directions:
1. Wefilled the saucepan about one third full of water and placed the large bowl ontop. The bowl doesn’t need to be directly in the water. Given that pure wax does not clean easily from metal surfaces, we have designated a bowl to use for only candle-making.
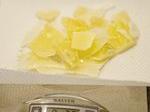
2. Whilethe water comes to a boil, weigh your beeswax until you have enough to fill thenumber of molds you have plus a little extra. Our mold needs 1.8 oz of wax, so we measured 2 oz to besure we had enough to fill to the top of the mold. (Some wax will stick to the edges of both bowls.)
3. Meltthe wax in the bowl of the double boiler.
4. Asthe wax starts to melt, dip the wick into the wax to coat it fully.
5. Threadthe wick through the bottom of the mold with the wicking tool. Pull through themold until you have a few inches coming out the top.
6. Centerthe wick in the mold and clip the wick with the bobby pin to hold it in placeagainst the top of the mold. Place rubber band around the top of the mold tosecure it.
7. Whenthe wax is melted, pour from the double boiler into the glass measuring cup(pouring cup).
8. Slowly,to prevent bubbles, pour wax into mold until it reaches the top edge of themold.
9. Setmold aside and wait for wax to harden. We found about 45 minutes to beadequate, but several hours is best. The candle comes out of the mold moreeasily with less risk of breaking off ears and such.
10.Once waxhas hardened, remove rubber band, carefully open mold, grip the wick and pullcandle out.
11.Finishing:Trim the wick to 1/4 inch at the bottom of the candle. Scrape bottom several times on anempty piece of foundation (or any rough surface) to smooth out. Dig out the wick from the waxand reform into firm string. Place the wick holder tab on the bottom of thecandle so the remaining wick threads through it. Push wick holder tab into waxand fill hole with the wick by smashing it down until the candle sits level on the table.
Tips:
-We found that in a cold kitchen, it’s best to keep thepouring cup in a 175° ovenso that the glass is warm. Otherwise, the wax will cool too quickly and hardenon the sides of the pouring cup and you will not have enough to fill the moldcompletely.
-Coating the wick with melted wax will help prevent you from pulling the wick too tight through the mold, which may cause a problem with burning later.
-If you thread the wick through the bottom of the mold (which would be the top of the candle) with a significant length of wick at the end, the mold will automatically re-wick as you pull the finished candle out of the mold.
-We also found that the bottom of the candle will get anindentation of the bobby pin if you do not raise the bobby pin somehow. After tryingseveral different ways, we found two small pieces of cardboard on either sideof the mold (see photo above) worked well.
-Instructions for candle making usually suggests using MoldRelease, or PAM to make it easier to remove the candle once hardened. We used PAM cooking spray for our firstcandle and decided not to use it for the remaining candles.The lubricant did make it easy toremove from the mold, but we suspect it also pooled in one of the ears of thebear and caused deformation. Use at your own discretion.
-HAVE FUN!
TA DA!
By Kimberley Burch, Sunset imaging specialist


