How to Preserve Potatoes Without a Root Cellar
We tore through our first two crops of potatoes like starving dogs, not thinking to save any for fall or winter cooking. Boy, did we regr...
We tore through our first two crops of potatoes like starving dogs, not thinking to save any for fall or winter cooking. Boy, did we regret it. When the weather is cold, you really crave potatoes—and we had none. So we ended up buying some from the farmers’ market.
This summer, hoping to stay true to eating only what we grow, we decided to try to store our potatoes. We’d try to do this even without a root cellar, the handy below-stairs cave that still anchors many an old house in the North, East, and Midwest, keeping foods cool and fresh long after harvest.
Well, in California we don’t tend to have root cellars. Being a young state, our building boom came after improvements in food delivery began, and with it the ability to buy any kind of food at any time of year. Who needs a cellar when you have the grocery store? Also, you can keep tubers and root vegetables in the ground here for a very long time. As long as they don’t freeze, they stay pretty fresh.
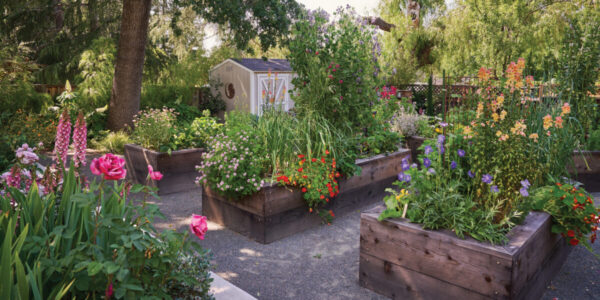
Our trouble is that we don’t have an inch of room to spare in our garden. It’s all being used for growing the next season’s worth of food.
So we experimented. Here’s what we came up with, after reading several root cellar books and consulting with the kind and amiable Greg Lutovsky, who owns Irish Eyes in Washington State. He grows mountains of potatoes every year and knows exactly how they need to be stored.

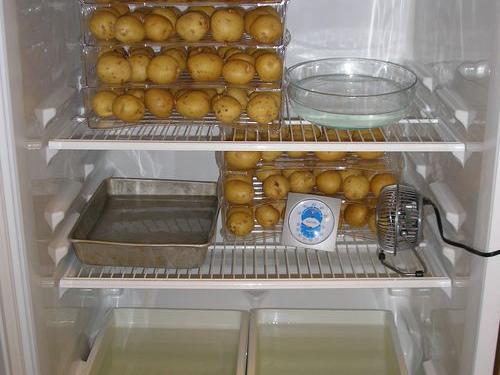
Our makeshift root cellar, with tubs of water for moisture, a dualmoisture/temperature monitor, and a tiny fan for ventilation
1. Choose unbruised, unblemished potatoes and let them cure (if freshly harvested), spread out in a single layer, at room temperature in a dark, well-ventilated place such as an outdoor shed for about 2 weeks. This will toughen their skins and make them last longer.
2. Arrange the potatoes in single layers in slatted stackable boxes (we used clear acrylic letter trays from an office supply store). Slide the boxes into a clean, empty fridge set to between 40° and 42°F. The beat-up old “extra” fridge some people have in their garages is great for this. We used one in an unused office space at Sunset. (Don’t store apples or alliums like garlic, onions, or shallots in the same space,adds Lutovsky, because all of them emit ethylene gas, which will make the potatoes sprout.)
3. Keep the potatoes in complete darkness, so they don’t develop toxins (which they do if exposed to light). Because light also turns potatoes green, a green hue is a pretty good indication of toxicity. How keep them in the dark? Unscrew the fridge’s light bulb.
4. Keep the potatoes humid—very humid (at 90% humidity, in fact); otherwise, they shrivel. To boost moisture, fill a couple of wide, deep pans with water and slide them in next to the potatoes. Also, remove the shelf that covers the crisper drawers down at the bottom, and fill the drawers with water.
5. To monitor conditions in the fridge, set a combination hygrometer (moisture meter) and thermometer on a shelf. It costs about $10 at a hardware store.
6. The last requirement: ventilation. Set a small desk fan on one of the fridge’s shelves to keep the air circulating. Plug the fan’s power cord into an electrical socket near or behind the fridge (the fridge shuts easily over the cord). Refill the water once a week or so.
We realize that this is a somewhat energy-gobbling way to save your spuds, but if you really want to do it, at least you know how.The potatoes should last for at least 3 months and, depending on their variety (drier potatoes last longer) and your maintenance of the storage conditions, up to 6.
Today, 4 1/2 months after harvest, we cooked up about a third of those potatoes as for a winter one-block feast. Test kitchen coordinator Stephanie Dean turned them into fat, crispy steak fries. Apart from a few sprouts here and there, the potatoes were fine. And they tasted wonderful.
Chances are good that we’ll post that recipe tomorrow.