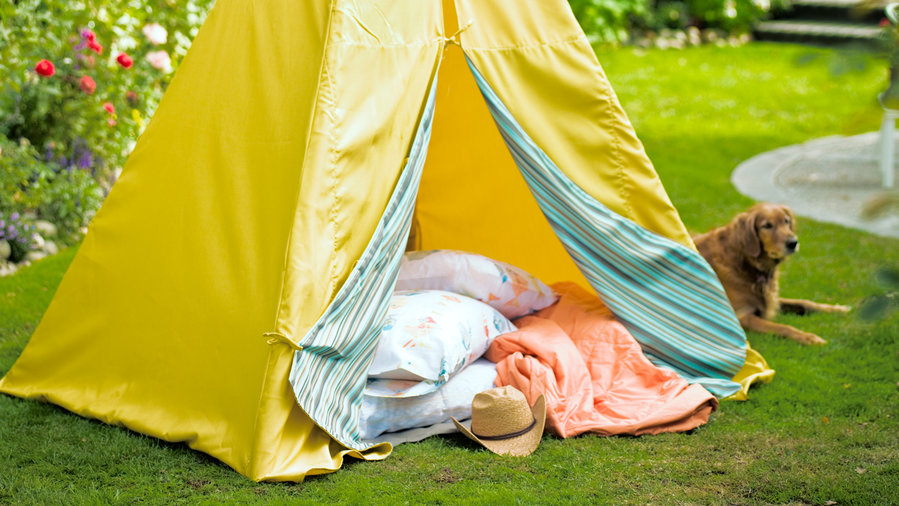

DIY backyard tipi
With some basic, straight sewing, you can make this tipi in about 8 hours for $395. You'll need:
- Five 10-foot bamboo poles (2 inch diameter; we used Tonkin species from Cali Bamboo: $8 each with minimum order of 10)
- 3 yards of 3/8-inch sisal rope
- 15 yards of weather-resistant fabric like Sunbrella: We used 11 yards of Spectrum Daffodil #48024 for the exterior; 1½ yards (optional) of Caroline Seabreeze #5644 for the inside front flaps; and 2½ yards of Spectrum Graphite #48030 for the liner under the mattress
- Sewing machine
On a flat surface in your yard, measure out a rectangle that’s 81 inches by 59 inches. Place 4 bamboo poles upright, 1 at each corner of this rectangle. Place pole 5 between 2 back poles for stability. Tether the 5 poles with the sisal rope.
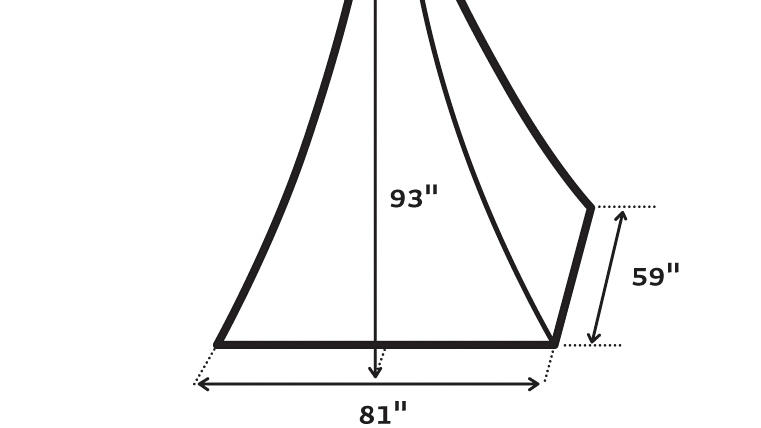
Backyard tipi: Step by step
When your tipi is complete, it will be 81 inches wide by 59 inches deep by 93 inches tall, with a 20-inch fabric circumference at top (see figure 1).
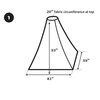
Backyard tipi: Fabric cover
Make 2 panels for the front flaps of the tipi and 2 panels to stitch together as the back of the tipi: Start by measuring out 2 lengths of your main/exterior fabric, each 46½ inches by 93 inches. Place these 2 lengths of fabric on top of each other and cut as shown to make 4 pieces, each 42½ inches at base width, 4 inches at top width, and 93 inches in height.
Front and back panels: Hem tops 1/2 inch and turn again 1/2 inch. Hem bottoms 1/2 inch and turn again 1/2 inch.
Back panels only: Stitch center back seams together to make 1 solid back panel.
Backyard tipi: Make side panels
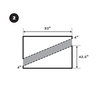
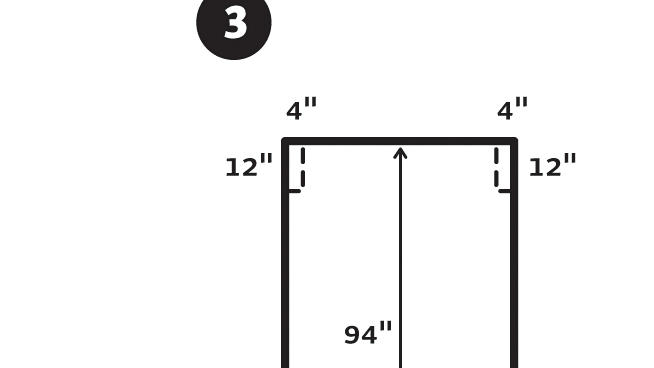
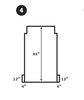
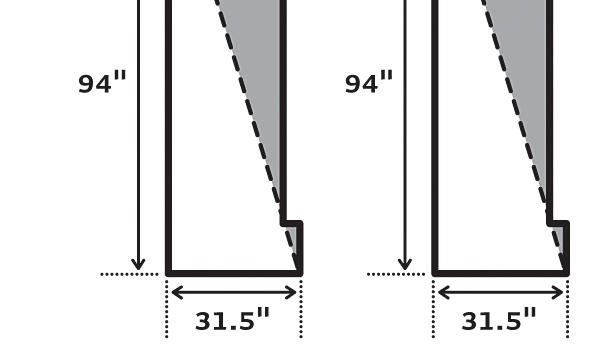
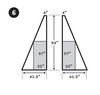
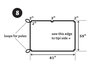
Make 2 side panels, 1 for each side of the tipi: Cut 2 pieces of fabric, each 94 inches long and 55 inches wide (see image). Cut top 4 corners 12 inches along selvage vertically and 4 inches in from selvage horizontally (see dashed area); save these small pieces for step 3.
Backyard tipi: Sew
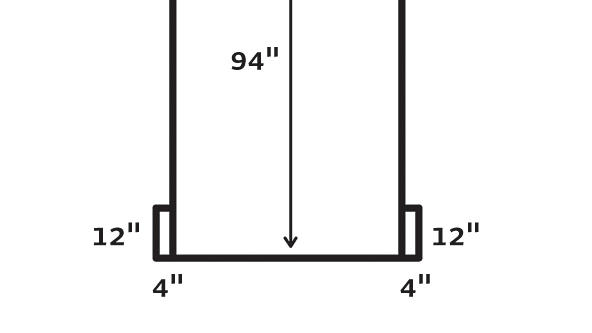
Sew the small pieces (from the previous step) to bottom corners of each larger piece.
Backyard tipi: Cut and hem
Fold selvage to selvage (see figure). Cut top 3 inches from fold; cut bottom 31½ inches from fold. Repeat to cut both pieces as shown.
Fold seam to outside and top-stitch. Hem top 1/2 inch, turn again 1/2 inch, stitch. Hem bottom 1/2 inch, turn again 1/2 inch, stitch.
Tipi project: Create lining (optional)
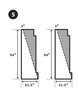
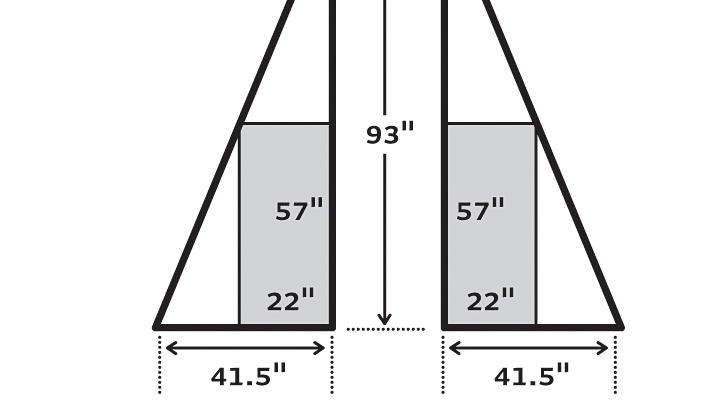
If you bought “contrast” fabric, cut 2 pieces of it, each 57 inches long by 22 inches wide. Place each on a front panel/flap—wrong side to wrong side, squaring front corners (see figure). Turn under 1/2 inch on top, side, and bottom; top-stitch onto front.
Backyard tipi: Attach sides and ties
Use your main/exterior fabric for all of the following pieces.
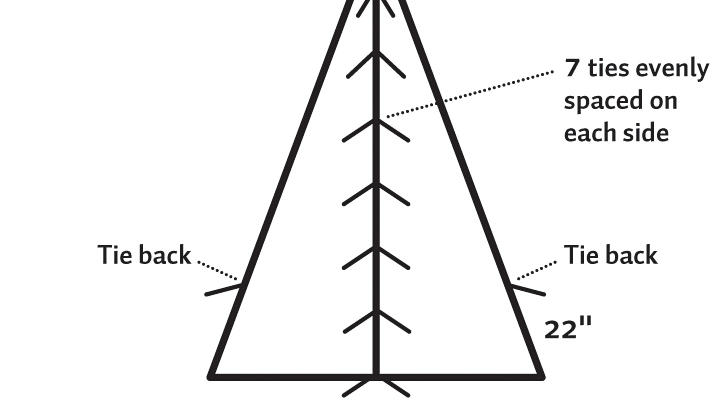
Make the ties for the front flaps and base loops: Cut 18 pieces, each 10 inches by 2 inches; fold twice and stitch. Use 14 of these 10-inch ties on the front flaps of the tipi, evenly spacing and sewing 7 on each flap (see figure). Use 2 of these 10-inch ties as “tie backs,” sewing 1 on each front edge of the tipi (see figure). Reserve the remaining 2 of these 10-inch ties to use in the final step as base loops, to attach the base liner to 2 of the bamboo poles (explained in next figure).
Make the interior bamboo pole ties (including a 20-inch loop for the top of the tipi): Cut 16 pieces, 20 inches by 2 inches each; fold twice and stitch. You’ll use 15 of these 20-inch ties on the interior of the tipi.
Sew side seams together.
Using the 20-inch ties made above, position 3 of the 20-inch ties along each of the 5 interior seams (these will secure the tipi to the 5 bamboo poles): place 1 at bottom of tipi, 1 at 30 inches up, and 1 at 70 inches up; stitch each into place.
Sew the remaining 20-inch tie in the tipi’s top right corner. This will loop around all 5 bamboo poles to further secure the tipi.
Backyard tipi: Base liner
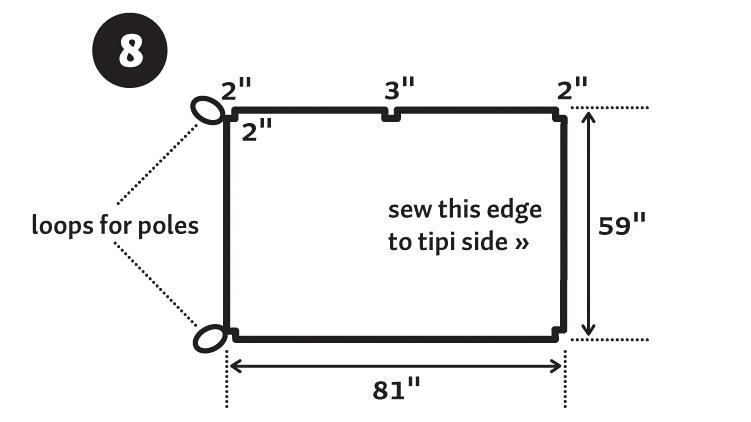
Using your base-lining fabric, cut a piece 81 inches by 59 inches. At each of the 4 corners of this fabric, cut out a 2-inch by 2-inch square (see figure), to allow the 4 bamboo side poles to remain in contact with the ground.
Cut a 3-inch by 3-inch square from the back edge of the base liner (see figure), to allow the rear bamboo pole (pole 5) to remain in contact with the ground.
Hem all sides and cutouts toward wrong side.
Following the figure, sew 2 remaining 10-inch ties (created in last step) into loops at the left side corners of base liner. These loops attach the base liner to 2 of the tipi’s side bamboo poles.
Finally, attach the base liner to one side of the tipi: Following the figure, stitch the loop-free 59-inch side of the base liner to the bottom of one 59-inch side of the base of the tipi.
Design: Trisha Olson, Out-N-In, Sausalito, CA (415/935-5929)
Resources: Bamboo poles are from Cali Bamboo (888/788-2254). Sunbrella fabric can be special-ordered at Calico Corners and Jo-Ann Fabric and Craft.

