
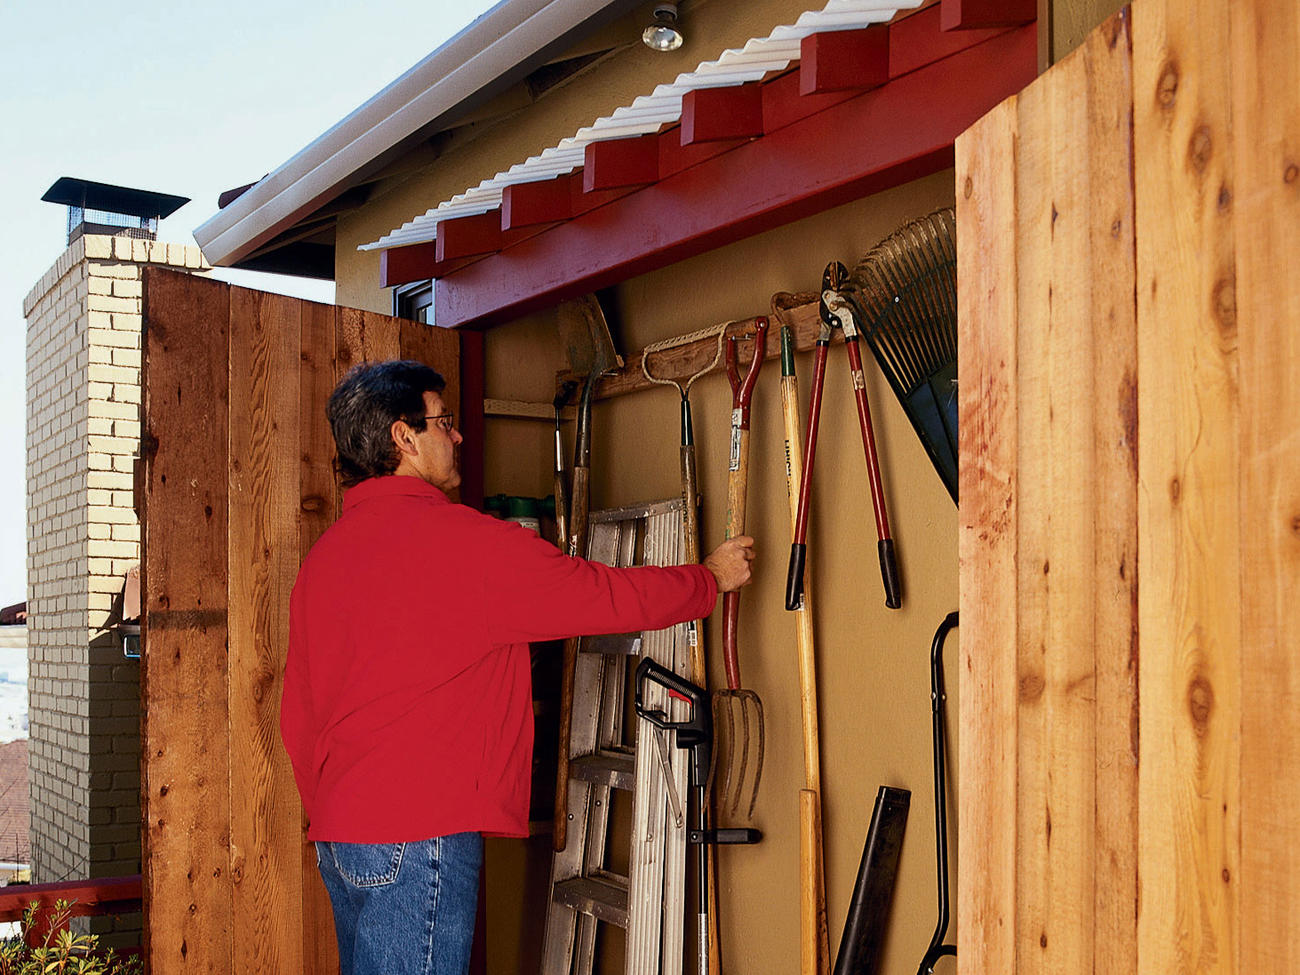
How to Make an Under-Eaves Storage Locker
This slender structure is an all-weather toolshed that you can build in a weekend
Thomas J. Story
Attached to the outside of the house, this 15 ½-inch deep structure opens to reveal a spacious (7 ½ feet by 6 feet) storage area. The 72- by 80-inch opening accommodates two barn doors, which we built from rough-sawn fence lumber, but you could save time by purchasing exterior or screen doors. Adjust the size of your shed’s opening to fit the doors you select.
Build the shed in sections; then paint, bring to site, and install.
Time: Two days to build and install for an intermediate woodworker
Cost: Less than $400
Materials
You’ll need one sheet of plywood to make the two ends and the floor module. (We used a rough-sawn-texture exterior plywood.) The exposed wood ― rafters, filler blocks, front posts, and front beam ― are Douglas fir, but you could select other woods.
Shell
- 1 sheet 5/8-inch exterior plywood
- 1 7-foot-long 4-by-6
- 3 8-foot-long 2-by-4s
- 2 7-foot-long 4-by-4s
- 7 8-foot-long 2-by-4s (pressure-treated)
- ½ pound 2 1/2-inch deck screws
- ¼ pound 4-d galvanized common nails
- 8 3-inch-long lag bolts
- 2 8-foot lengths of U-shaped plastic channel to fit edge of plywood
- 7 L-shaped framing anchor brackets
- 5 U-shaped hurricane-tie brackets
- 2 quarts exterior paint
- 2 8-foot “wiggle” boards for roof panels
- 1 2- by 8-foot corrugated roof panel
Doors
- 11 8-foot-long rough-sawn 1-by-8s
- ¼ pound 1 3/8-inch deck screws
- 1 quart wood preservative
- 4 8-inch-long strap hinges
- 2 door handles
- 1 hasp
Tools
Pencil, circular saw, electric drill with drill and Phillips-head bits, hammer, wrench, tape measure, protractor, carpenter square, framing square, level, and masking tape.
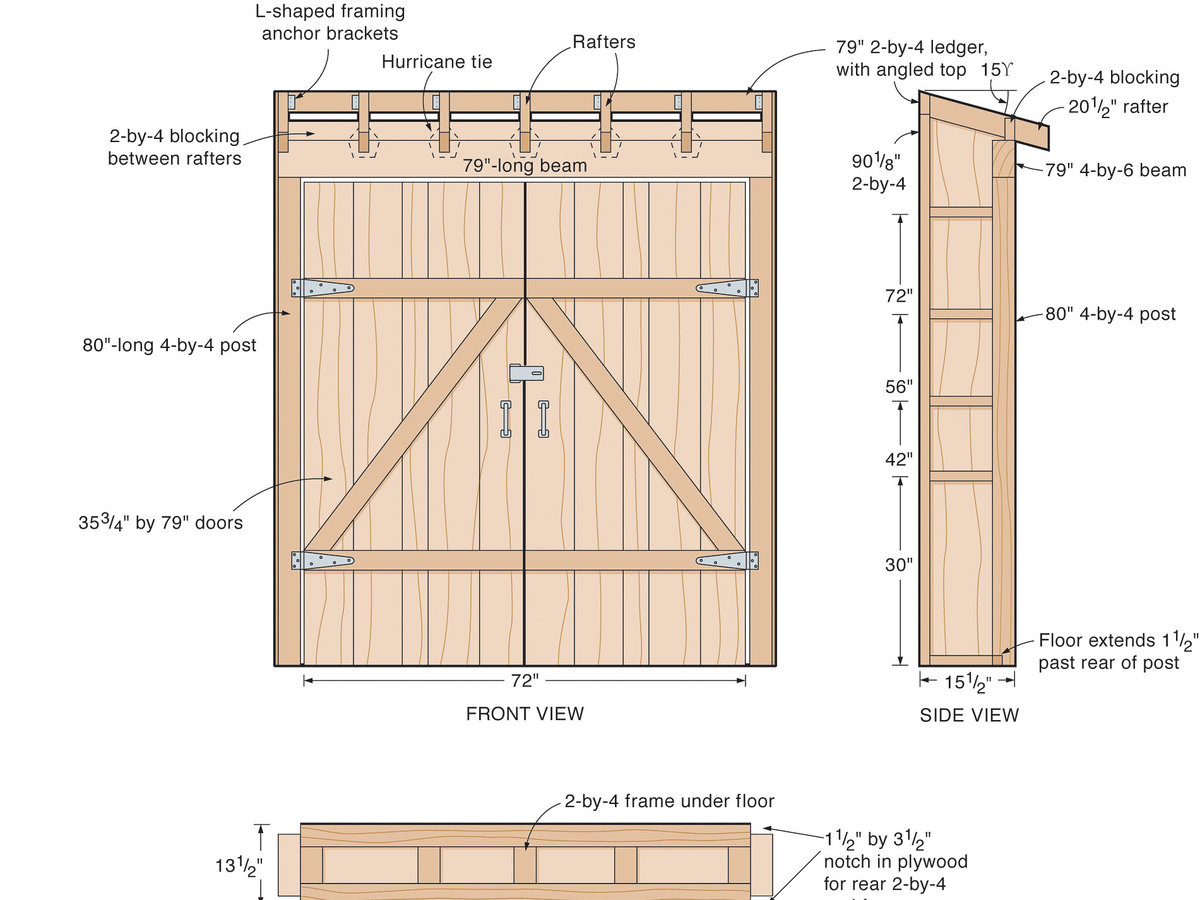
Troy Doolittle Topdog Illustration
Directions
1. Rip the plywood into two 15 ½-inch- and one 13 ½-inch-wide pieces.
2. Follow the side-view diagram, and, on what will be the inside face of both side panels, draw the location of the posts, front 4-by-6 beam, and 2-by-4 rear ledger, cross blocking, and rafter. Note that the ledger is cut at a 15° angle and matches angle of rafters.
3. Cut each 4-by-4 to measure 80 inches long and two of the pressure-treated 2-by-4s to 90 1/8 inches long. Position them on panels to check fit, then cut and position cross blocking between these boards (see sketch). Drive 2 ½-inch screws through rear 2-by-4s and into blocking, then toenail or screw the blocking to the back of the 4-by-4 posts. Overlay the plywood on each assembled frame. Before nailing plywood, cover its long front edge with a U-shaped plastic channel. (Remember, the side assemblies are mirror images.)
4. For the ledger, set the circular saw 15° off vertical and rip the top edge of another pressure-treated 2-by-4 (see diagram). Cut this board to 79 inches long. Cut 4-by-6 to same length for front beam.
5. Use protractor to lay out seven 20 ½-inch rafters with 15° angle off vertical at both ends on two of the fir 2-by-4s (see sketch). Cut boards.
6. Mark locations for equally spaced rafters on front of ledger. Screw L-shaped framing anchor brackets to one side of each rafter location.
7. Transfer same rafter locations to top of 4-by-6 and attach the hurricane-tie brackets for the inner rafters to the top inside edge. They should extend high enough to hold angled rafters against top front of beam.
8. Build floor assembly from remaining piece of plywood and pressure-treated 2-by-4s. Note that the front edge of the floor starts 2 inches in from the outside of the post. (This insets the door and allows the floor assembly to act as a stop.) The plywood extends 3 ½ inches at each end, but you must notch front and rear corners to fit around the posts.
9. From final piece of fir 2-by-4, cut blocking to fit between rafters.
10. Paint parts, making sure to seal bottom of posts with several coats to prevent moisture damage.
11. Take components to site. Mark location of one side panel, checking verticality with level. Attach panel with three lag bolts to wall of house, position ledger on panel, check horizontality with level, and attach with lag bolts. Add floor, other end, and front beam. Drive screws through sides and into beam and ledger ends.
12. Add rafters, securing them with screws running through front and rear brackets. Fit blocking between rafters along front top edge of 4-by-6.
13. Add “wiggle” board molding to top of ledger and above blocking.
14. Cut corrugated roofing panel into four 24-inch-long pieces. (Hint: Tape over cut line and saw through tape for cleaner cut.) Overlap roof panels on wiggle board, drill pilot holes, and attach with screws.
15. Cut remaining pressure-treated 2-by-4 so it fits inside the shed between the side panels. Add hooks or screws to suspend garden tools.
